How to repair a hole in a downspout?
Sealing Small Holes Effectively
Sealing small holes in a downspout can be an important task to prevent water leakage and ensure proper drainage. The first step is to clean the area around the hole thoroughly. Remove any dirt, debris, or rust to create a smooth surface for the sealant. Various products are available specifically for downspout repair, including silicone sealants that offer flexibility and durability. Applying a generous amount of sealant over the hole and smoothing it out ensures a tight seal that will withstand the elements.
After applying the sealant, allow it to cure as per the manufacturer's instructions. This step is crucial, as it ensures the sealant adheres properly and functions effectively. Regular inspections of the downspout can help catch any small holes early, preventing more significant issues later on. If done correctly, sealing small holes will extend the life of the downspout and keep it functioning optimally.
Using Sealants and Adhesives
Selecting the right sealant or adhesive is crucial for effective downspout repair. Choose a product that is specifically designed for outdoor use to withstand changing weather conditions. Silicone sealants offer excellent water resistance and flexibility, making them ideal for areas prone to expansion and contraction. Before applying the sealant, ensure that the surface is clean and dry to enhance adhesion and longevity.
When applying the sealant, fill the hole generously to create a strong bond. Smooth out the edges with a putty knife to prevent water from seeping through any gaps. Allow sufficient time for the sealant to cure according to the manufacturer's instructions before testing your downspout. A successful application will result in a watertight seal that minimizes the risk of future leaks.
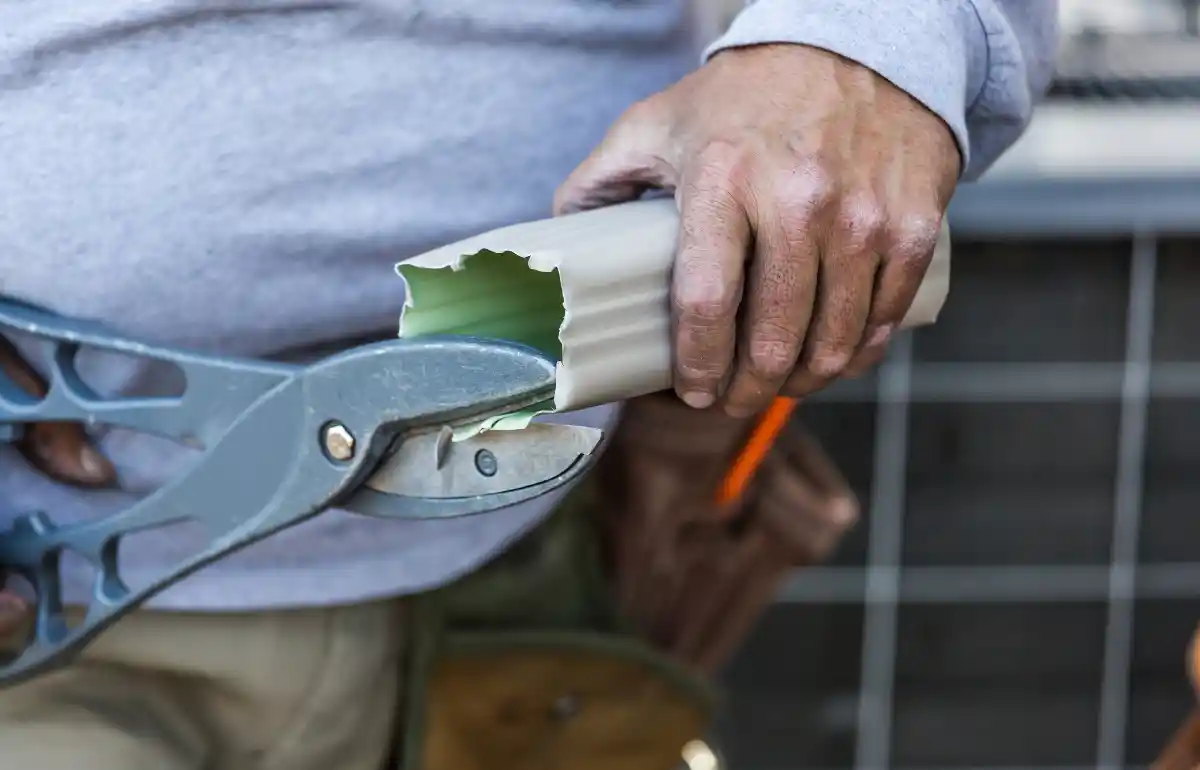
Fixing Larger Holes
For larger holes in a downspout, a more robust approach to downspout repair is necessary. Begin by cleaning the area around the hole thoroughly to ensure that any debris or rust is removed. Once the surface is prepped, cut a piece of metal flashing or a patch that is slightly larger than the hole. This patch will provide sufficient coverage and stability for the repair.
Secure the patch over the hole using a strong adhesive specifically designed for metals. If the hole is exceptionally large, consider using rivets or screws to fasten the patch for added strength. After the patch has been affixed, apply a generous layer of sealant around the edges to prevent moisture from seeping underneath. This method not only repairs the hole effectively but also protects against future leaks.
Patching Techniques and Materials
For effective downspout repair, selecting the right materials is essential. Metal patches often work best for metal downspouts, providing a durable and weather-resistant solution. To apply a metal patch, cut a piece of sheet metal a few inches larger than the hole. Secure it in place using roofing screws and a silicone sealant along the edges to prevent water from seeping through. This method ensures a sturdy fix while maintaining the structural integrity of the downspout.
If the downspout is plastic, consider using a plastic repair kit or a patch made from similar plastic material. Start by cleaning the area around the hole thoroughly. Cut the patch to size, ensuring it extends beyond the edges of the damage. Use a plastic adhesive specifically formulated for outdoor use to bond the patch onto the downspout. This technique not only prevents further leaks but also helps preserve the downspout's functionality and appearance.
Ensuring Proper Water Flow
Ensuring proper water flow is essential after any downspout repair. A well-functioning downspout directs rainwater away from the foundation of the building, preventing potential damage. Once the repairs are made, check the alignment of the downspout to ensure it is straight and securely attached to the gutter system. Any misalignment can disrupt water flow and lead to pooling or overflowing issues.
After making adjustments, it is important to run a test using water. Pour a bucket of water into the gutter above the downspout and observe how well it descends through the repairs. Look for leaks or any excessive water buildup that may indicate further issues. This step is vital to confirm the effectiveness of the downspout repair and to ensure that water is efficiently routed away from your property.
Testing the Downspout After Repair
Once you have completed the downspout repair, testing is crucial to ensure functionality. Start by running water through the downspout to check for any leaks or areas where water may not flow properly. Observing the water flow will help you identify potential weaknesses in your repair. Look for signs of pooling or dripping, as these can indicate unresolved issues.
If the water flows smoothly without leaking, you can feel confident in the effectiveness of your downspout repair. It may be useful to monitor the performance during a rainstorm to see how it holds up under real conditions. Regular inspections after heavy rain can help catch any future problems early, ensuring your downspout remains in optimal condition.
FAQS
What materials do I need to repair a hole in a downspout?
You will typically need sealants or adhesives for small holes, patching materials (like metal or plastic patches), screws or rivets, and waterproof tape for larger holes. Additionally, tools such as a caulking gun, scissors, and a utility knife may be helpful.
Can I use duct tape to repair a hole in a downspout?
While duct tape can provide a temporary fix for small holes, it is not a long-term solution. It's best to use materials specifically designed for outdoor conditions, such as sealants or proper patching materials.
How can I tell if my downspout needs repairs?
Look for signs such as water pooling around the foundation, leaks, rust spots, or visible holes. If you notice any of these issues, it's a good idea to inspect the downspout for damage.
Is it necessary to remove the downspout for repairs?
It is not always necessary to remove the downspout, especially for small holes that can be sealed directly. However, for larger repairs, you may find it easier to work with the downspout removed.
How can I ensure proper water flow after repairing the downspout?
After making the repair, test the downspout by pouring water through it to ensure there are no leaks. Make sure that the repaired area is sealed well, and check that the downspout directs water away from the foundation effectively.